
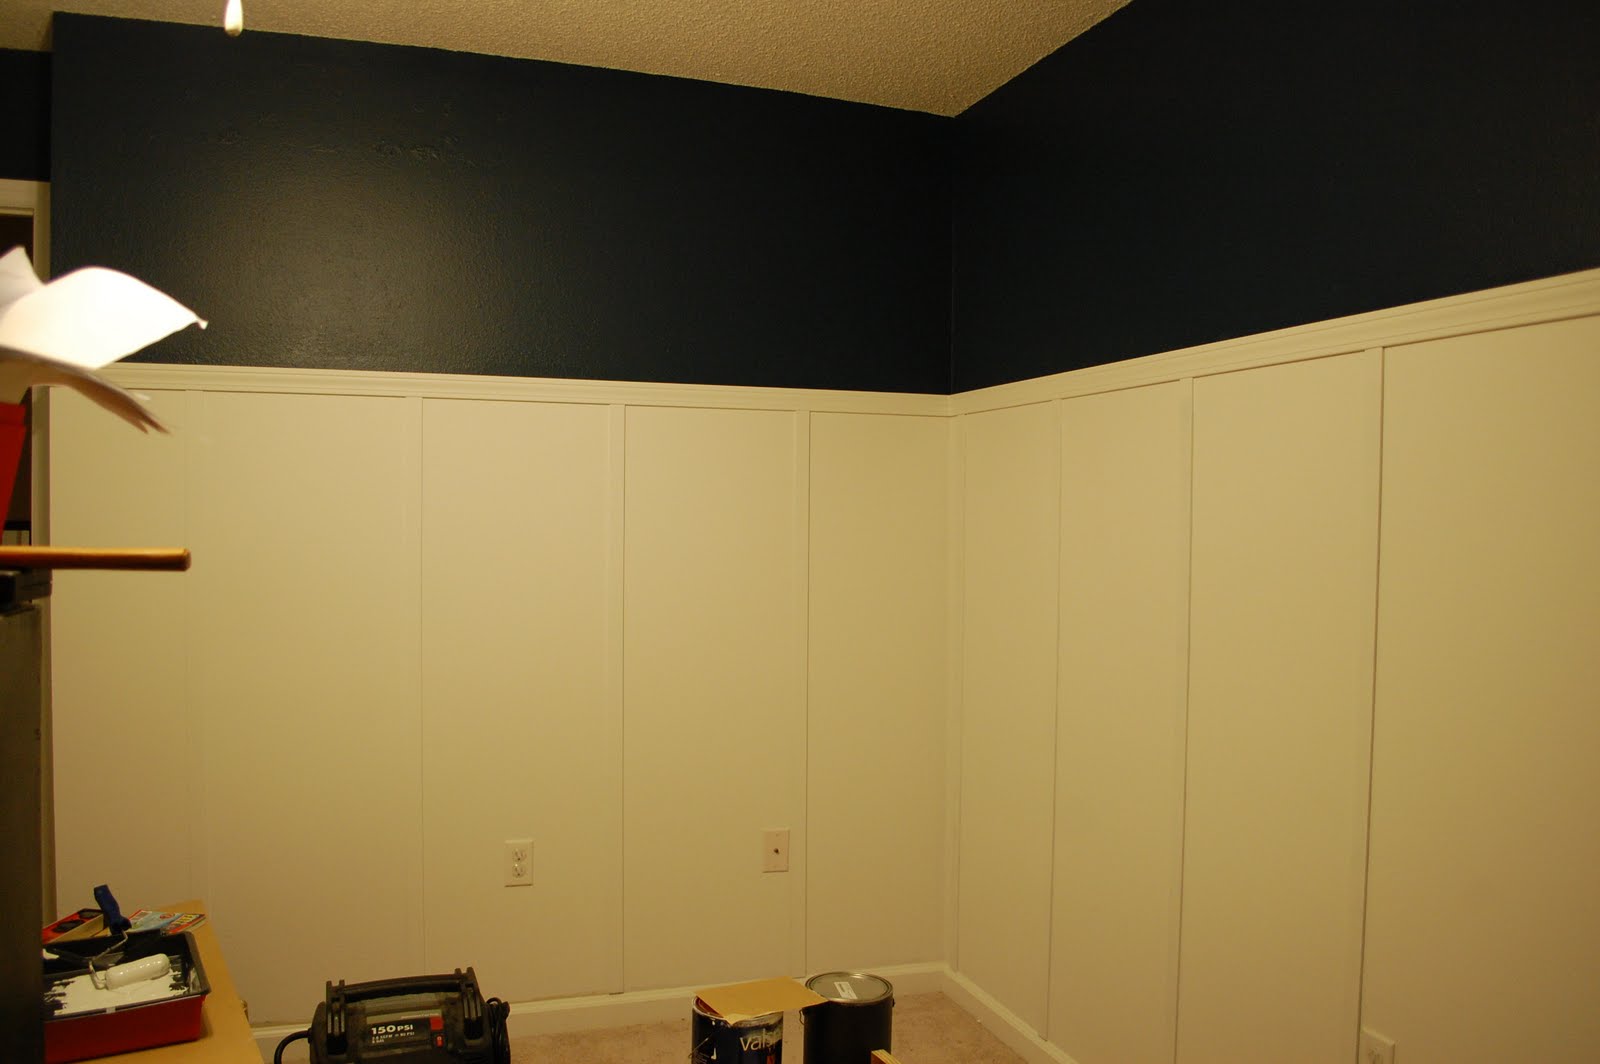
Yay! We are pretty much finished with Parker's faux board and batten walls! Just another coat of white paint and we are done! Please excuse the mess in the picture. We are using his room to build hit boat bed so there are tools and wood everywhere! Sorry for the not-so-great picture... it actually looks ALOT better in real life but I didn't feel like messing with the settings on the camera to get a better picture!


I LOVE wainscoting of any kind, so when I found out we were expecting another baby, I knew that whatever room we re-did would have to have some sort of wainscoting in it! My favorite is probably board and batten, but I am pretty sure that is also the most expensive kind. I don't give up easily though, so with a little research and a few trips to Lowes I had a plan for faux board and batten! Maybe not quite as good as the real thing, but close enough! Maybe I will get the real thing one day :)
We started by drawing a line about five foot high around the perimeter of the room. I wanted the board and batten to be more of a plate-rail height, so I just chose five foot so that I could get two boards from every piece of lattice we bought (see below). My Dad painted above the line a dark navy while Jerod painted below the line white to match the existing trim.

We then went to Lowes and bought 13 strips of 10' lattice strips (the nicer kind, not the rough outdoor kind). We have existing baseboards, so I wanted something that was not very deep so that the bottom edge of the lattice boards would sit flush up against the edge of the baseboards (and not overhang). We cut the strips in half length wise so we had 26 5' strips and then primed and painted them white before putting them up on the walls (you can see some of them leaning up against the wall in the pic above).
We then realized that cutting all of the boards to an even 5' did not accommodate for our slope-y (pretty sure that is not even a real word so I am not sure how to spell it) walls. Oops! Should have thought about that before hand.
We then decided we needed to cut and temporarily hang the top piece of trim to give us a level line to work with. Then we went back and used painters tape to tape up each piece of lattice board (to ensure I liked the spacing and there were no awkward places). Most of the lattice pieces were a tad to long (but all varying heights), so we use the level trim to mark a line where the lattice boards needed cut. We numbered the boards and the wall as we went so we could remember which board went where. A few short minutes later Jerod had all of the lattice boards cut to the right height and they were ready to hang!
After using a little adhesive caulk and a nail gun to secure the lattice boards in place, we took the top piece of trim back down, painted it white and then re-hung it permanently. A little wood fill and another coat of white paint to make it all look cohesive and we are done (although we have yet to do the last coat of white)!

Unfortunately, it took longer than it sounds! Of course this is mostly because we had a one and a half year old running around steeling our tools, but it also took some time to figure out the correct spacing of the lattice boards (so that we did not hit any electrical outlets, and so that there were not any awkward places) and some time to get all of the mitered cuts on the top piece of trim correct (this would have been simple if Jerod had not been using a cheap miter box and hand saw... but he couldn't justify buying the chop saw for 16 cuts). There was a little time spent figuring out the best way to do things too, but if we ever do it again (the kitchen is supposed to be next) I think it will go alot more quickly!
I really like how it turned out and am thankful Jerod did this project for me with no complaints! :) I think it will really make the room when it is all said and done!
I will post a better picture of the walls when his room is finished!

That looks soooo good! I can't wait to see the bed in there too!
ReplyDelete